
- Home
- Choose Your Klip
- About Klevaklip
- Deck Building Products
- Snap-Loc for Modwood® Decking
- Snap-Loc for Trex® Decking
- Merbau Clips
- KLEVAKLIP Installation Guides
- Contact us
- Online Shop
The Patio Deck Kit Height Adjuster is an optional add-on, which just clips onto the underside of the Patio Deck Kit Base Plate.
Compared to the basic Patio Deck Kit, the Height Adjuster gives a minimum height increase of 12mm (approx. equal to a 1:100 “fall” over a 1 metre length), resulting in a “top of joist” height of 46mm, and allows the Patio Deck Kit aluminium joist to be adjusted in small increments to a maximum top of joist height of 65mm. This is perfect for either raising your whole deck, or for taking the “fall” out of your concrete slab.
Note: Each Box of Optional Patio Deck Kit Height Adjusters contains 36 Adjusters
Click here for Optional Patio Deck Height Adjuster PDF Install Steps
Click here for PDKIT PDF Install Steps
Note: Each Patio Deck Kit contains 9 x Aluminium Joists@ 1,000mm (39.6 inches) long, 36 x Nylon Base Clips and 9 x End Caps.
The Patio Deck Kit is a simple but effective method of enabling a deck to be laid over a patio area with a stepdown from your patio door as low as 60 mm (2.5 inches) – whilst still keeping your joists off the concrete and maintaining the ability for water to flow under the joists. Actual top-of-joist height = 35mm (1.4 inches)
With the joists being made from aluminium and the support clips from a nylon compound, the Patio Deck Kit will not rot or rust, is UV stable, and can be used in any environment. It will last the life of your deck.
IMPORTANT NOTE:
Cyclone or Tornado areas – in these areas, as a minimum you need to secure every second base clip to your concrete with an 8 mm (5/16 inch) masonry bolt, plus all aluminium joists should be secured to the base clips via an 8g self-drilling tek screw on each side of the joist
ADHESIVES GUIDE
|
Approved Adhesives |
Coverage |
|
|
Soudal T-Rex Power Flexi SMX adhesive Soudal T-Rex Fast Grab SMX adhesive |
Aust / NZ: approx. 3.6 sq metres with joists @ 450mm centres USA: approx. 35 sq feet with joists @ 16 inch centres |
|
A good way to do this is to pour a bucket of water over the deck and see whether any puddles develop. For small (under 3mm or 1/8 inch deep) or negligible puddles – proceed to Step 3.
If concrete requires levelling proceed to Step 2.
Mix a batch of “concrete leveller” with water and pour over areas with depressions, allowing concrete to level out. Allow 24 hours for concrete to cure adequately.
Tip – on relatively small areas it may be easier to just pour the concrete leveller over the whole area rather than being specific to the areas with “puddles”.
Etch the areas on the concrete where you intend adhering the nylon base clips with a concrete etcher.
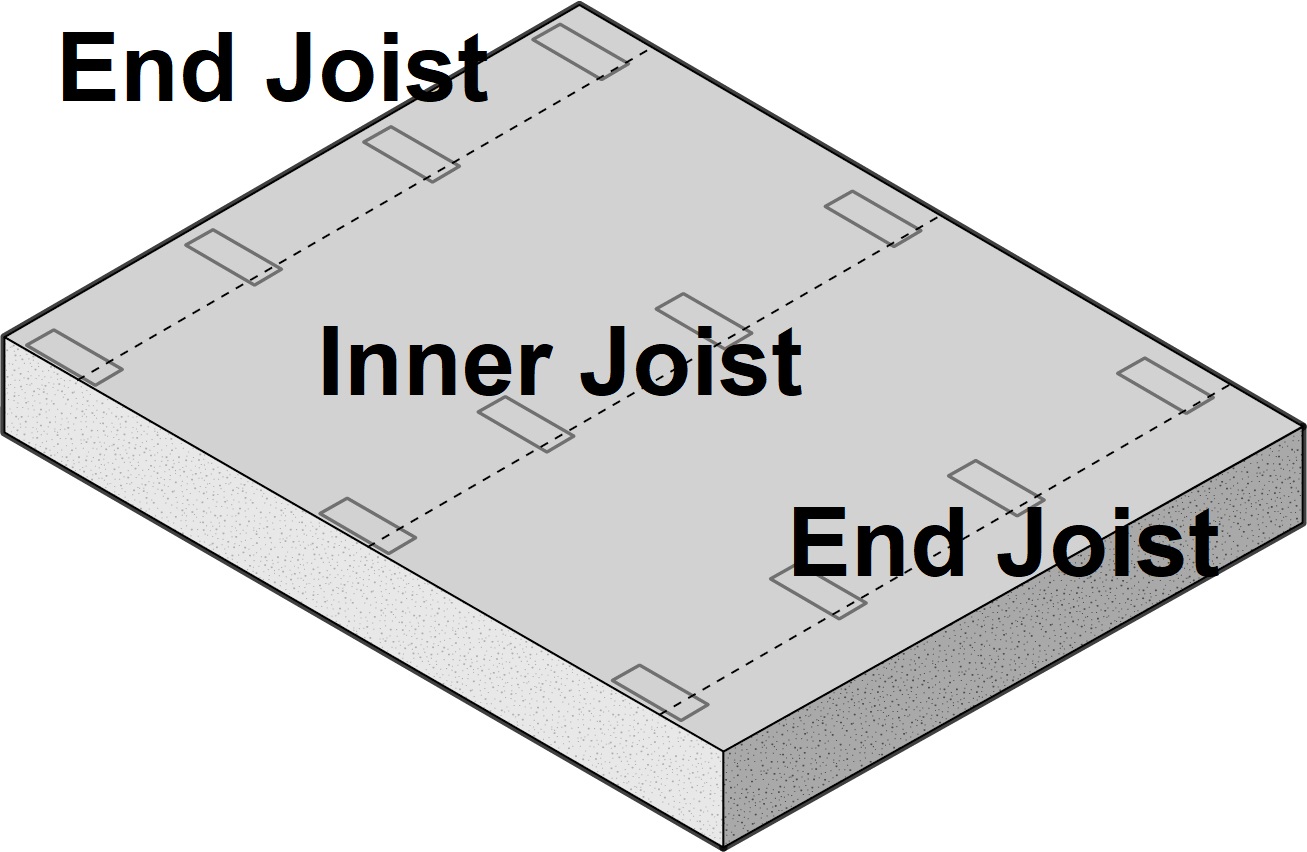
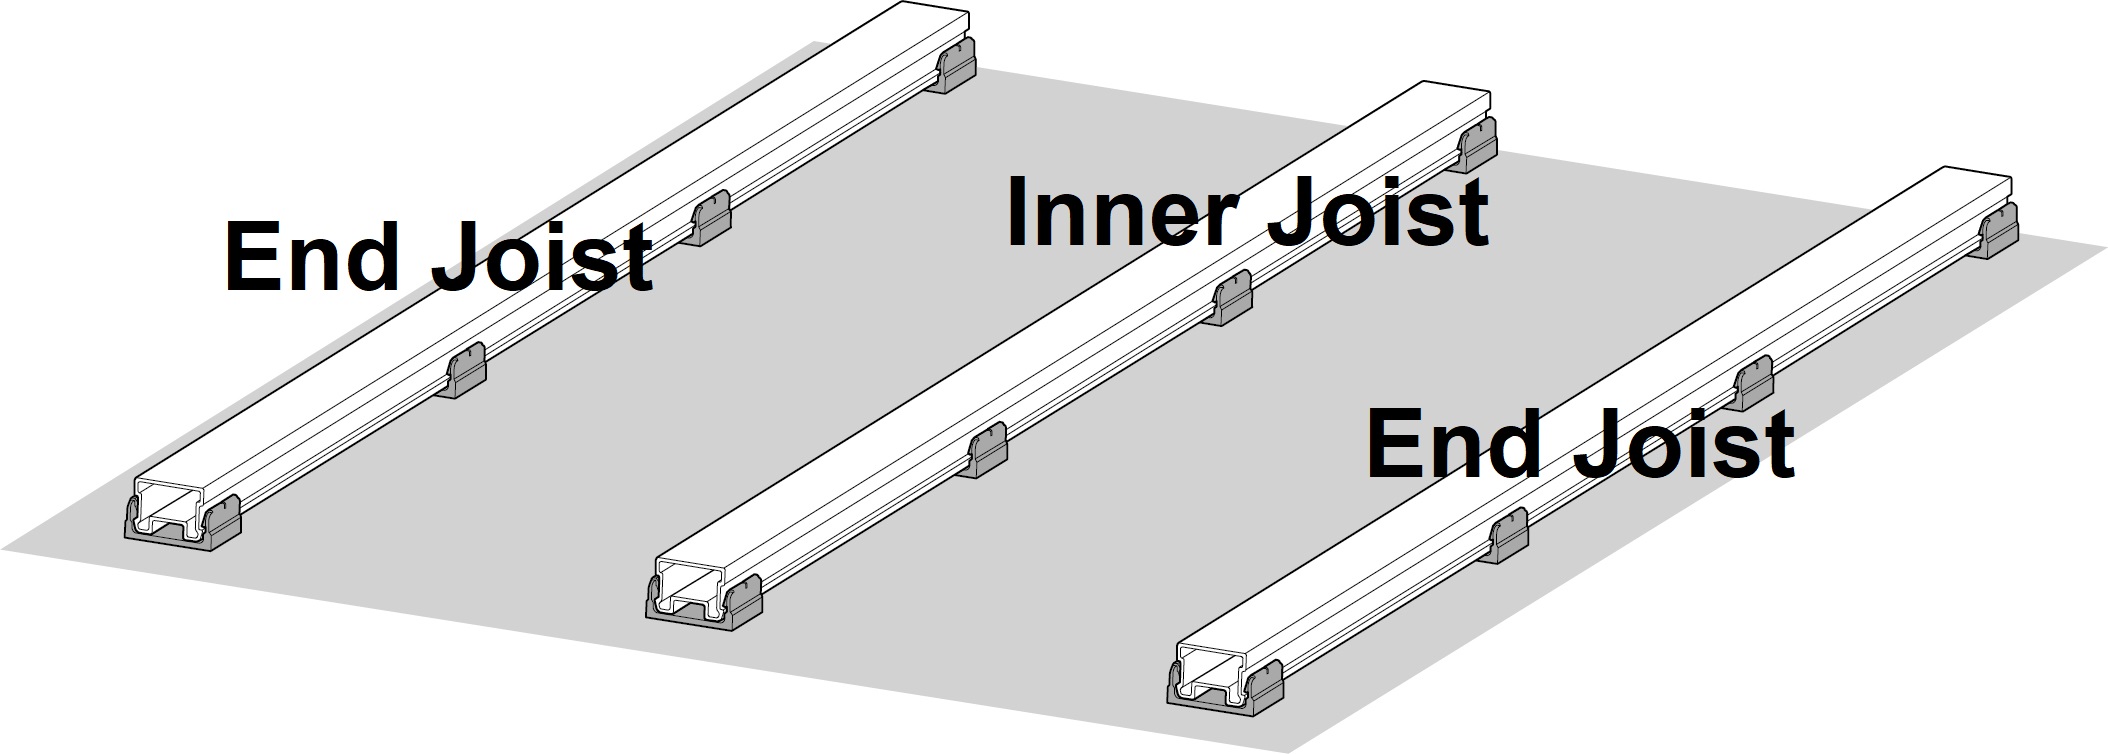
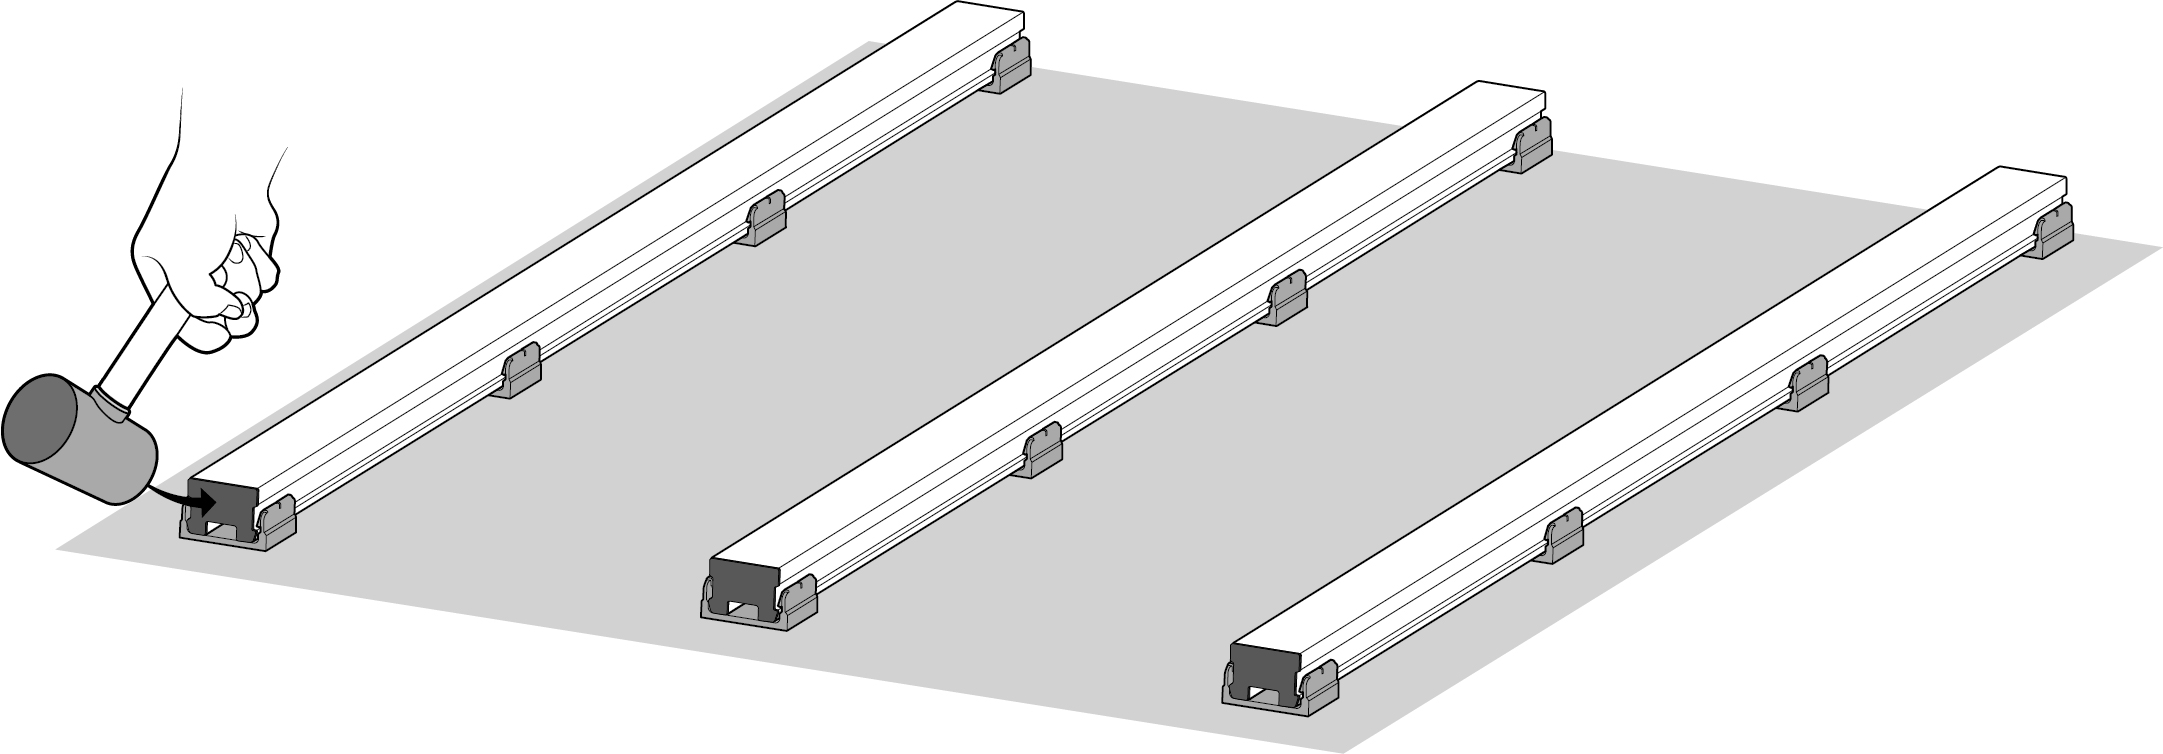
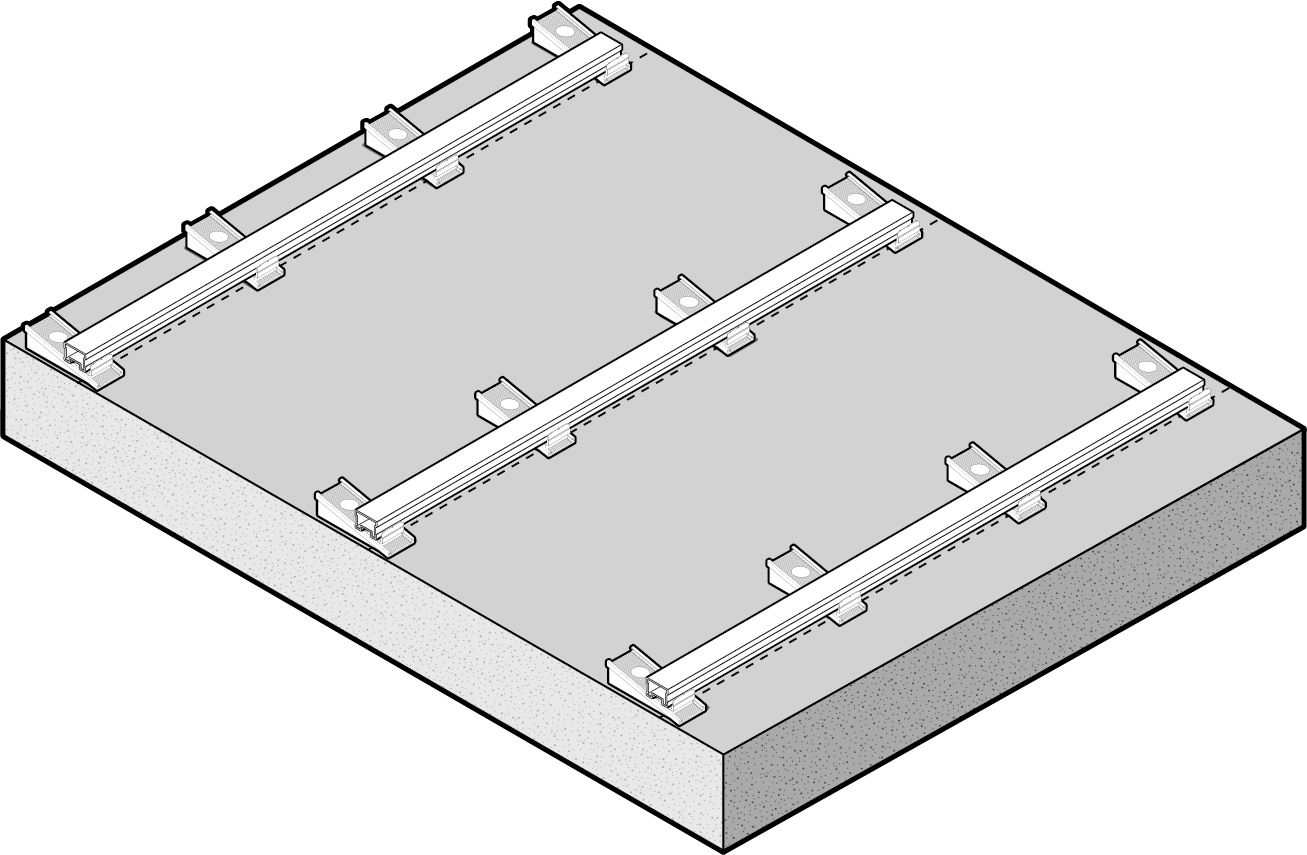
Clip base clips to aluminium joists at approx. 330 mm (13 inches) between centres and set out joists on the area. Max distance between joists is 450 mm (Australia) or 16 inches (USA).
Lay out joists on concrete as they should appear in final set-out. For details regarding joining of the joists please refer to Step 7.
Mark down both sides of the nylon base clips with a pencil line

Provided you don't have a membrane to contend with, for all end joists or end of section joists (eg where breaker boards are used), its good practise to secure the base clips with 8mm masonry anchors at both joist ends. For the remaining Base clips between both joist ends, these can be fixed to the concrete using approved adhesives.
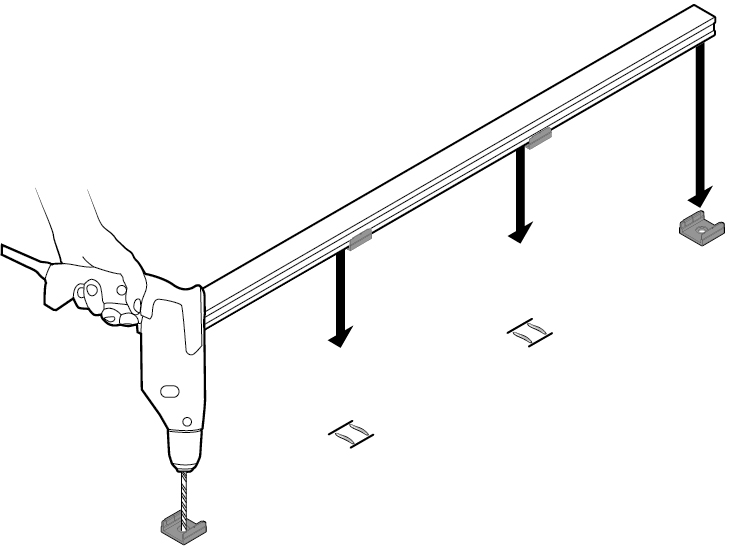
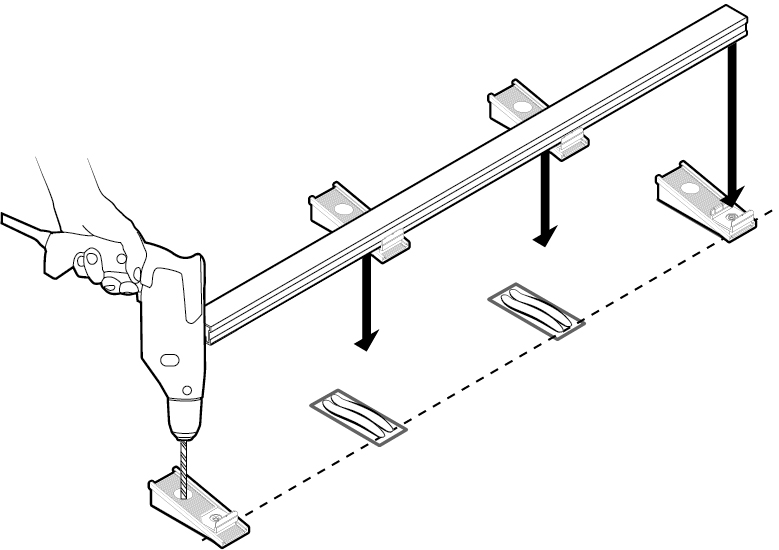
The fixing hole on the base clips will be covered by the joist, simply mark the position of the base clip on the concrete then slide the base clips from both joist ends.
Line up a "base clip" to the marked lines on the concrete and use it as a guide when drilling the 8mm hole. Fit 8mm masonry anchor at both end base clips and re-assemble top piece to its correct position.
Apply adhesive for both middle base clips then check with a spirit level.
Move the joist slightly to one side now pencil lines have been marked.
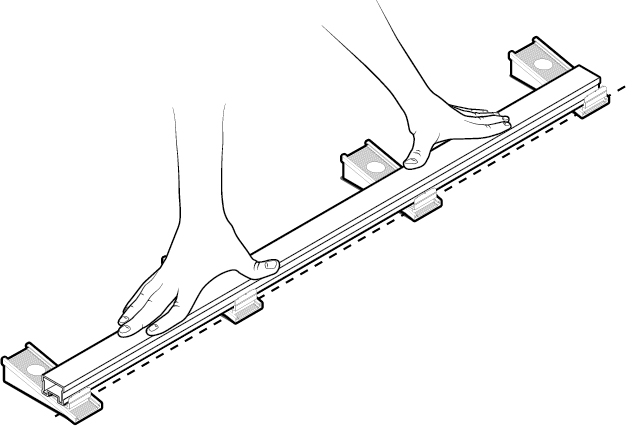
Working a single joist row at a time, apply two small beads of adhesive approximately 6mm to 8mm in height and 30mm to 40mm wide to marked spots. Use only approved adhesives

Place joist, with base clips attached, back onto adhesive – push down with medium force and allow to set.

Important:
To allow for maximum thermal expansion of joist, please provide a 1mm gap between joists at ends.
There are two options for joining the joists together:
Option 1: Using two Nylon base clips next to each other.
Option 2: Using a single base clip, making sure join lines up with the notch in the Nylon base clip.

Repeat Steps 5 – 7 for each other row of joists until deck structure is complete. Double-check that all joists are level before the adhesive has cured.

Allow 48 hours for cure – your Patio Deck structure is now ready for you to lay your decking boards.
.jpg)
Gently tap with a hammer or mallet to fit the end caps into the aluminium joists
The Patio Deck Kit Height Adjuster is an optional add-on, which just clips onto the underside of the Patio Deck Kit Base Plate.
Compared to the basic Patio Deck Kit, the Height Adjuster gives a minimum height increase of 12mm (approx. equal to a 1:100 “fall” over a 1 metre length), resulting in a “top of joist” height of 46mm, and allows the Patio Deck Kit aluminium joist to be adjusted in small increments to a maximum top of joist height of 68mm. This is perfect for either raising your whole deck, or for taking the “fall” out of your concrete slab.
Note: Each Box of Optional Patio Deck Kit Height Adjusters contains 36 Adjusters
Click here for Optional Patio Deck Height Adjuster PDF Install Steps
ADHESIVES GUIDE
|
Approved Adhesives |
Coverage |
|
|
Soudal T-Rex Power Flexi SMX adhesive Soudal T-Rex Fast Grab SMX adhesive |
Aust / NZ: approx. 3.6 sq metres with joists @ 450mm centres USA: approx. 35 sq feet with joists @ 16 inch centres |
|
Mark out the correct positions on your concrete slab for the aluminium joists at maximum distance between joists is 450 mm (Australia) or 16 inches (USA).
Either use a “straight edge” or run a string line and flick the line between these two marks. You will use these lines for the correct positioning of all your joists.

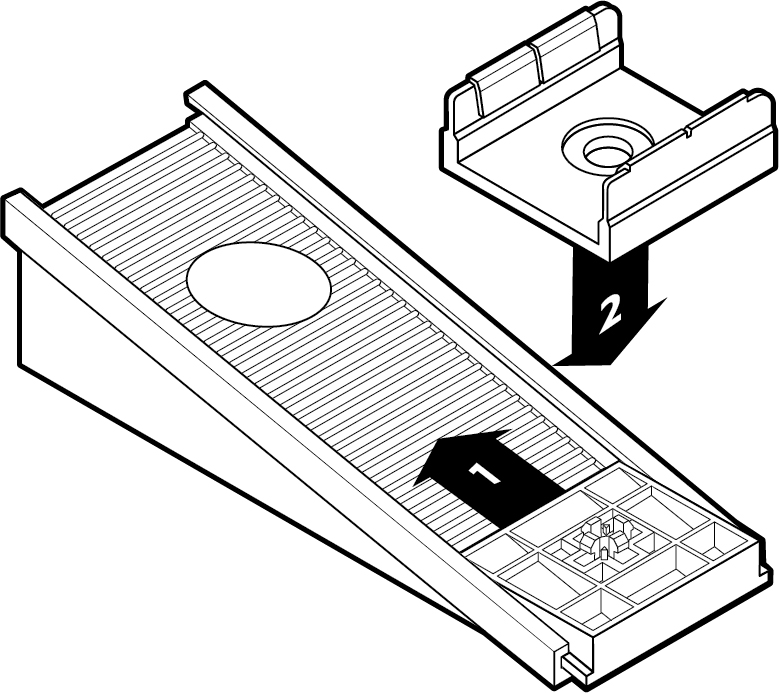
Starting from lowest end of the Base, line the Top Piece squarely to fit into the outside rails and slide upwards to increase the height. You can also decrease the height by lifting the Top Piece on the high side and sliding backwards.
Clip the nylon base plate on to the adjuster and adjust to the lowest height (the top piece will be sitting about a third way out of the base).
With all the height adjusters set at their lowest height, Clip height adjusters to aluminium joists at approx. 330 mm (13 inches) between centres.
Lay out joists on concrete as they should appear in final set-out lining up one side of the aluminium joist to the marked line. Place a sprit level on top of the aluminium joist and, maintaining your joist position, adjust the end height adjusters to the required height, then the adjust the two inner height adjusters, making sure they are sitting flat on the concrete surface. Note – depending upon concrete “fall”, the Adjusters may now be in a “staggered” position.
For details regarding joining of the joists please refer to Step 7.
Etch the area on the concrete where you intend adhering the Nylon Height adjusters with a concrete etcher.
With the joist now in its final position, carefully mark the “outline” position of each Height Adjuster.

Provided you don’t have a membrane to contend with, for all end joists or end of section joists (eg where breaker boards are used), it’s good practise to secure the Height Adjusters with 8 mm masonry anchors at both joist ends. For the remaining Height Adjusters in between both joist ends, these can be fixed to the concrete using approved adhesives.
In some cases, the fixing hole may be covered by the joist -simply mark the position of the Top Piece on the Base and slide off the Height Adjuster from both joist ends.
Line up a “Base” to the marked lines on the concrete and use it as a guide when drilling the 8mm hole. Fit 8 mm masonry anchor at both end bases and re-assemble top piece to its correct position.
Apply adhesive for both middle height adjusters then simply press the joist into both nylon base clips then check with a spirit level.
Place joist, with Height Adjusters attached, back onto adhesive – push down with medium force, check with a sprit level making sure you one edge of the aluminium joist is on or parallel to the marked line, then and allow to set.
If simply taking the fall (generally 1:100) out of your deck at the lowest height, the lowest end of your first row of joists should just sit in the Patio Deck Kit Base Clip.
The Height Adjuster, set at its lowest level, placed at the other end of the joist should give you a level joist. For the “mid-joist” supports on this first joist, use either a higher bead of adhesive, basic packers, or support the joist with the Height Adjuster without the base clip.
For subsequent joists, adjustment as shown in “Step 3” should resume.
IMPORTANT
To allow for maximum thermal expansion of joist, please provide a 1mm gap between joists at ends.
There are two options for joining the joists together:
Option1: Using a single Height Adjuster, making sure join lines up with the notch
in the Nylon base clip.
Option 2: Using two Height Adjusters next to each other.
If 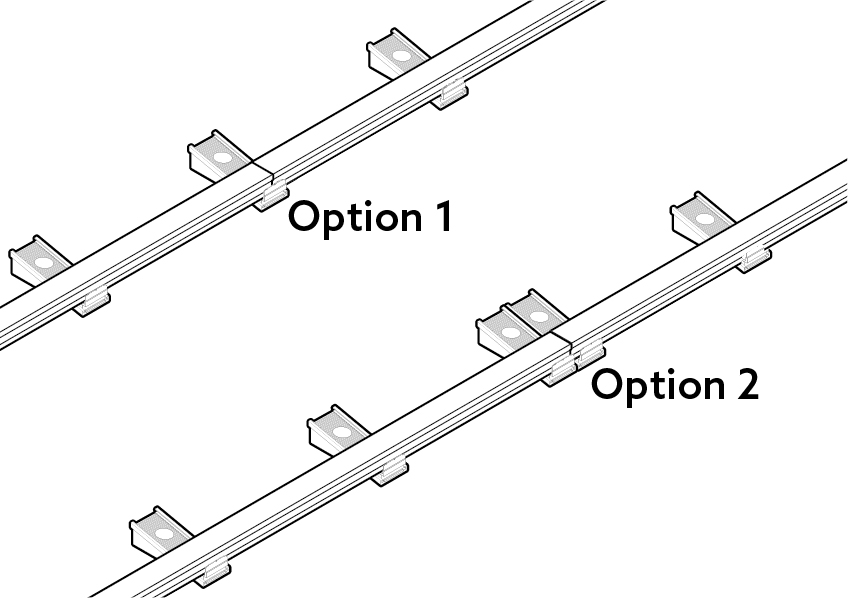
Allow 48 hours to cure your Patio Deck Kit structure is now ready for you to lay your decking boards.
Repeat Steps 5 and either 6A,6B or 6C for each other row of joists until deck structure is complete. Double check that all joists are level and also check the level across each joist at various positions before the adhesive has cured.
Gently tap with a hammer or mallet to fit the end caps into the aluminium joists